Inventory
This section covers the current inventory views validated during live capture. It is focused on list access, export, row actions, detail review, and record administration.
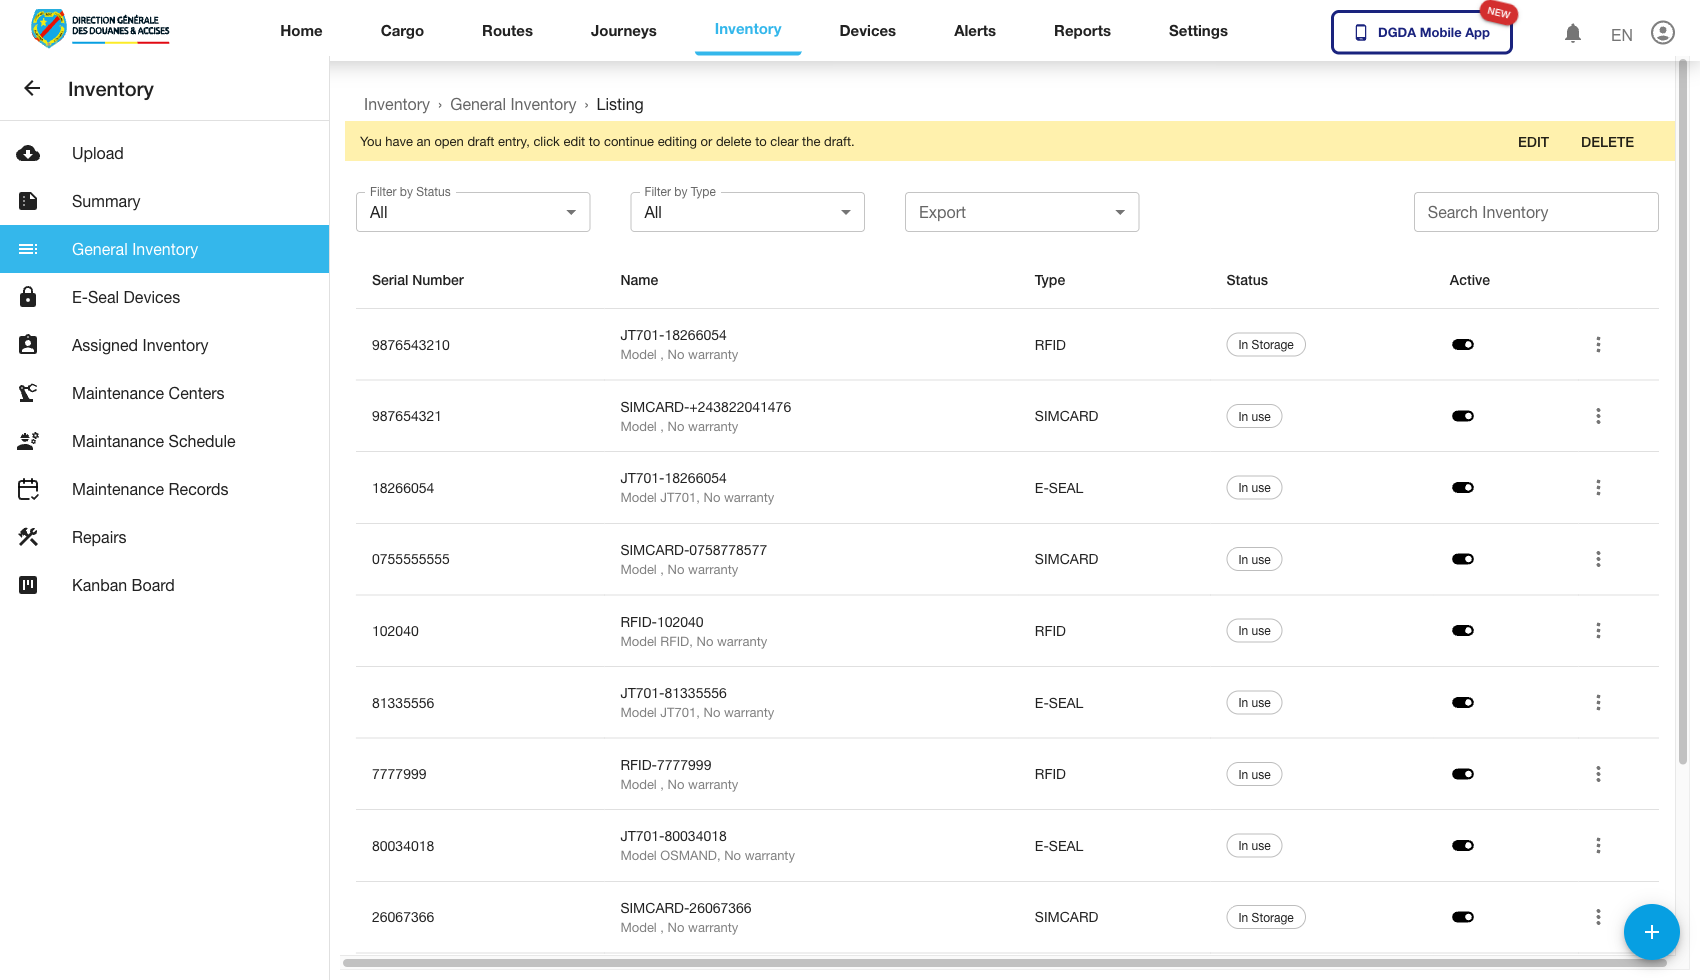
1. Review the Inventory List
Purpose: Browse the detailed inventory register.
Route / context: /inventories/inventory
Steps:
- Open Inventory from the top navigation.
- Select General Inventory.
- Use the available filters to refine the list by state or type.
- Search for a specific serial number or item when needed.
Expected result: The inventory list loads with searchable item records and filter controls.
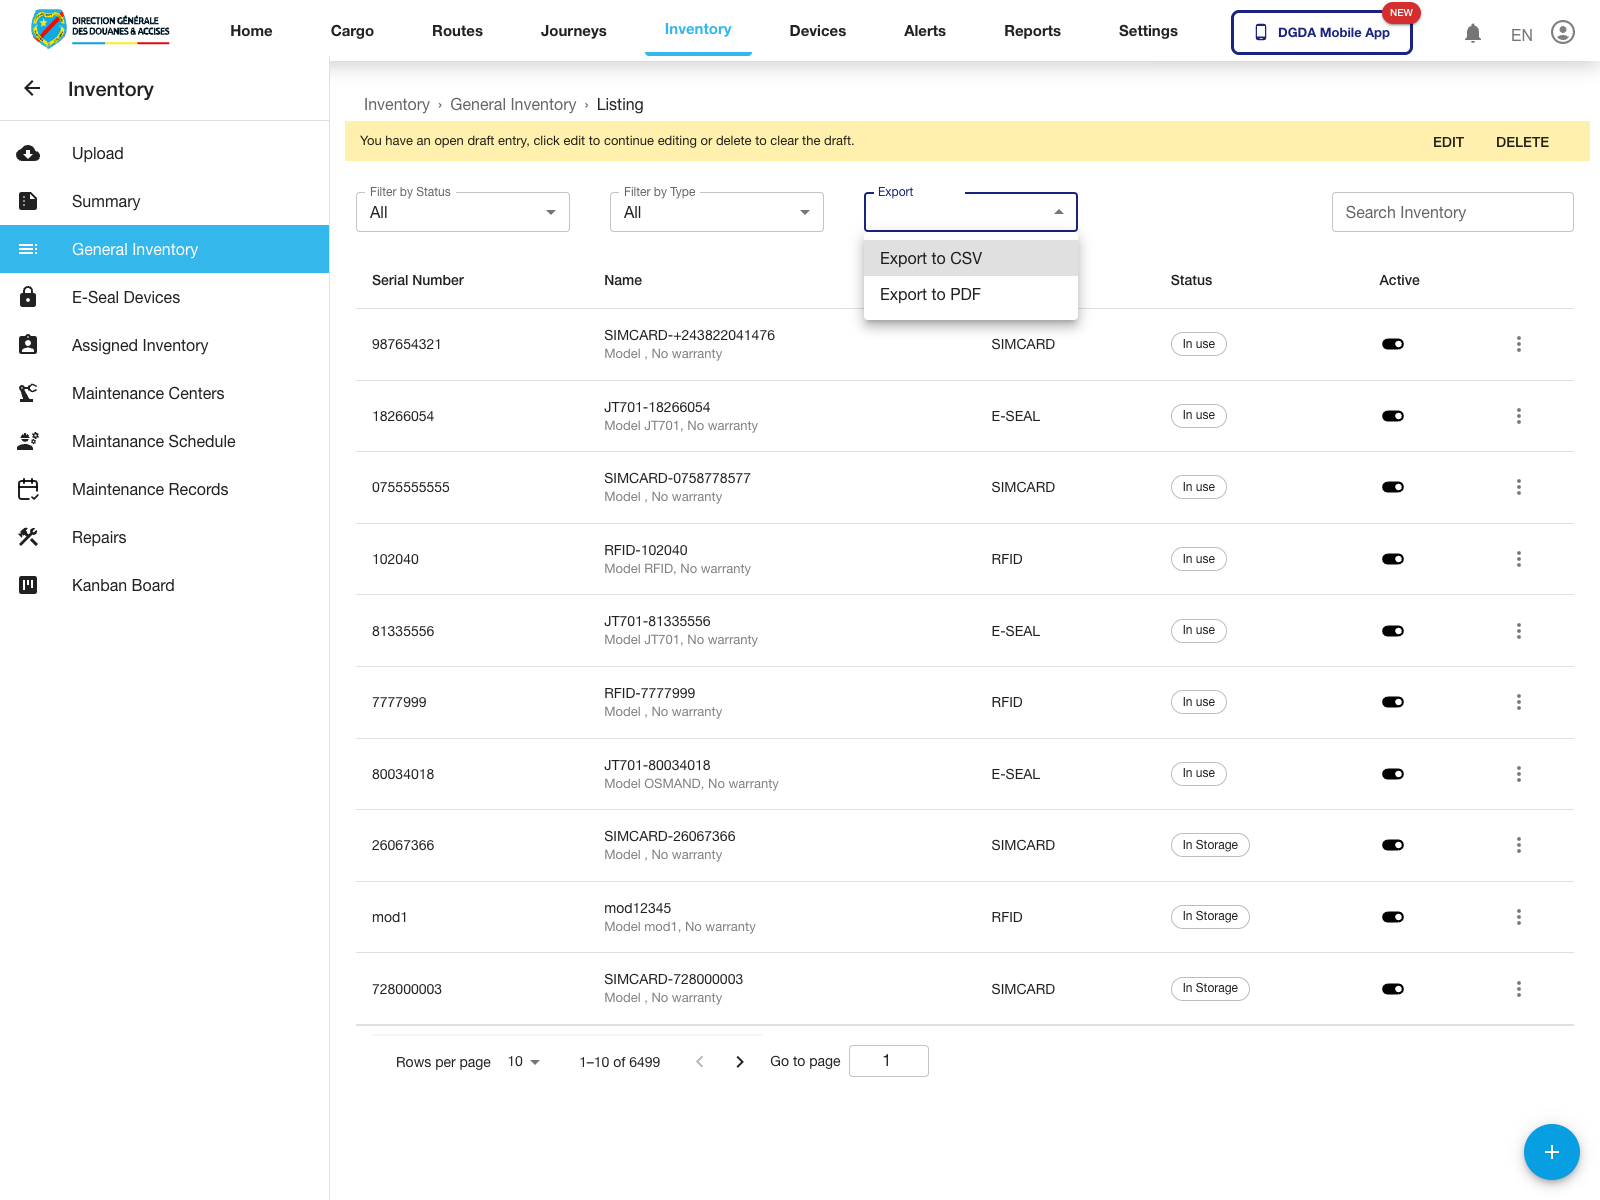
2. Export the Inventory List
Purpose: Prepare the current inventory list for offline analysis or sharing.
Route / context: /inventories/inventory
Steps:
- Open General Inventory.
- Use filters first if you want the export to reflect a narrowed list.
- Open the Export selector above the table.
- Choose the required format.
Expected result: The export menu exposes the supported output formats for the current list.
Observed live options: Export to CSV and Export to PDF.
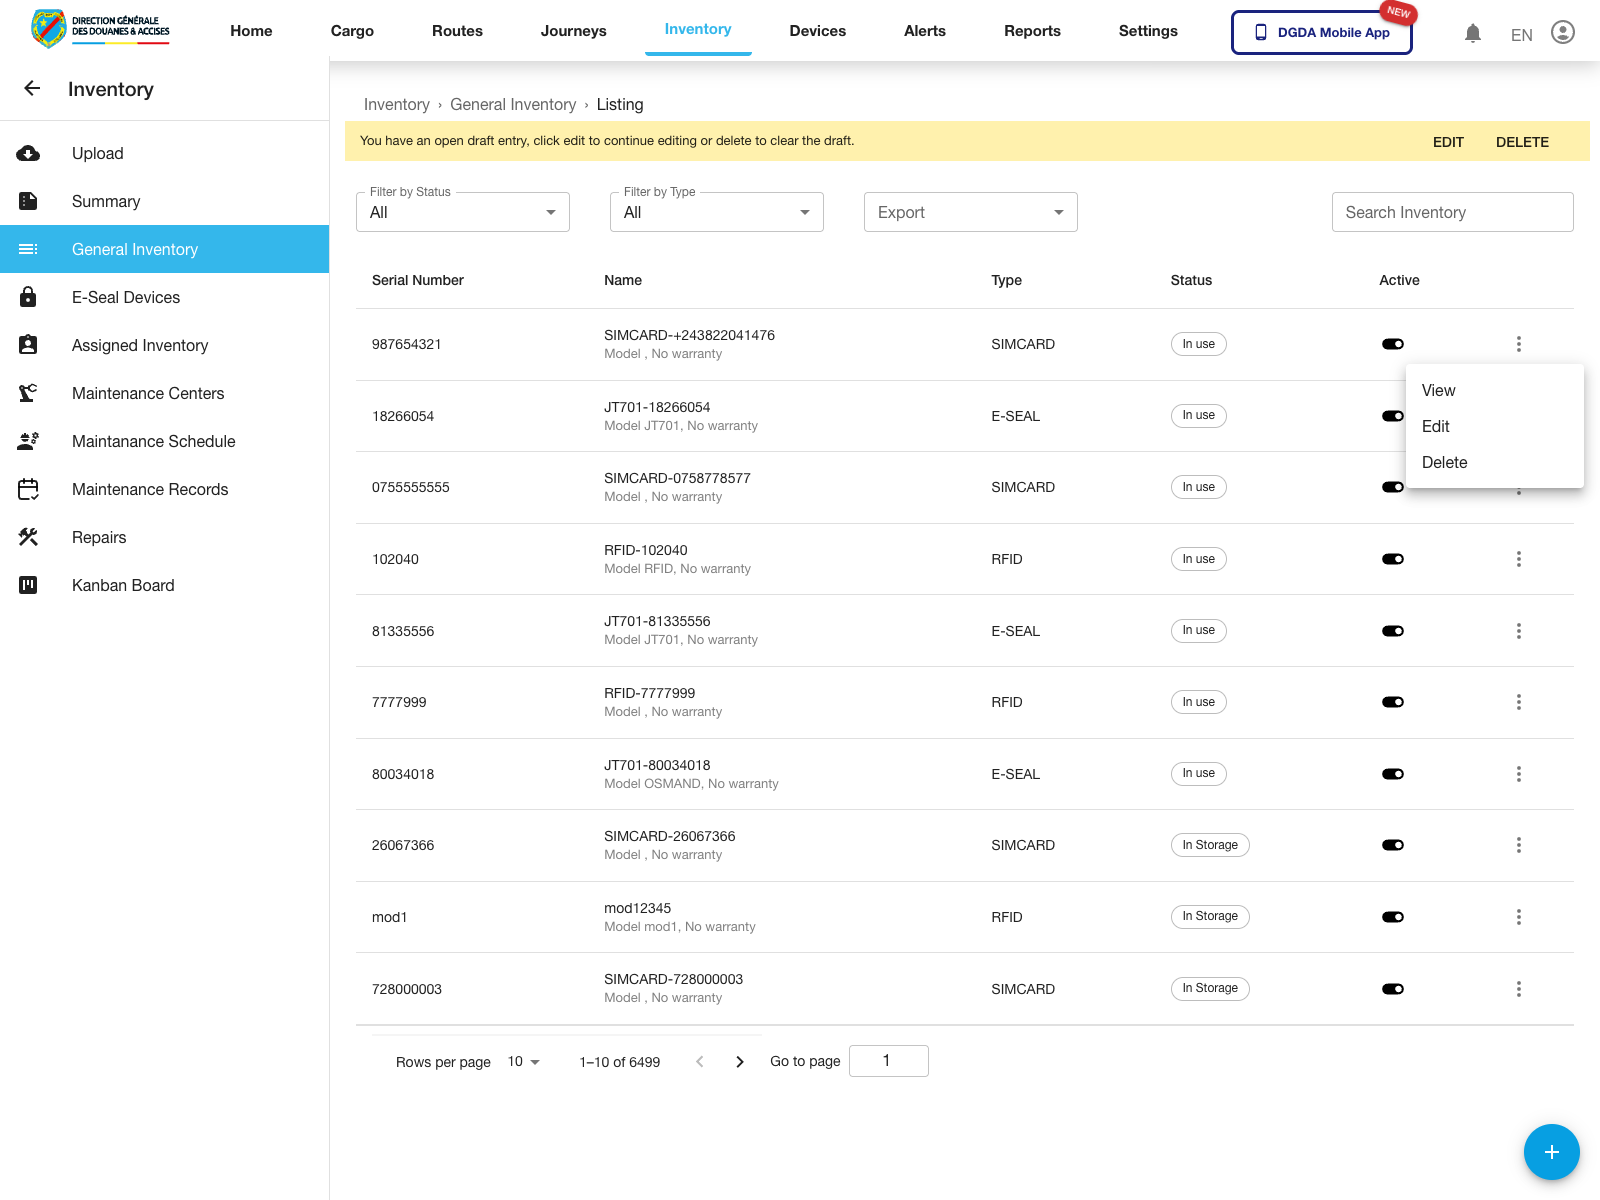
3. Open Inventory Row Actions
Purpose: Inspect the per-item actions available from the general inventory list.
Route / context: /inventories/inventory
Steps:
- Open General Inventory.
- Locate the inventory row you want to manage.
- Click the row action button.
- Review the actions before proceeding.
Expected result: The inventory row menu opens for the selected item.
Observed live actions: View, Edit, and Delete.
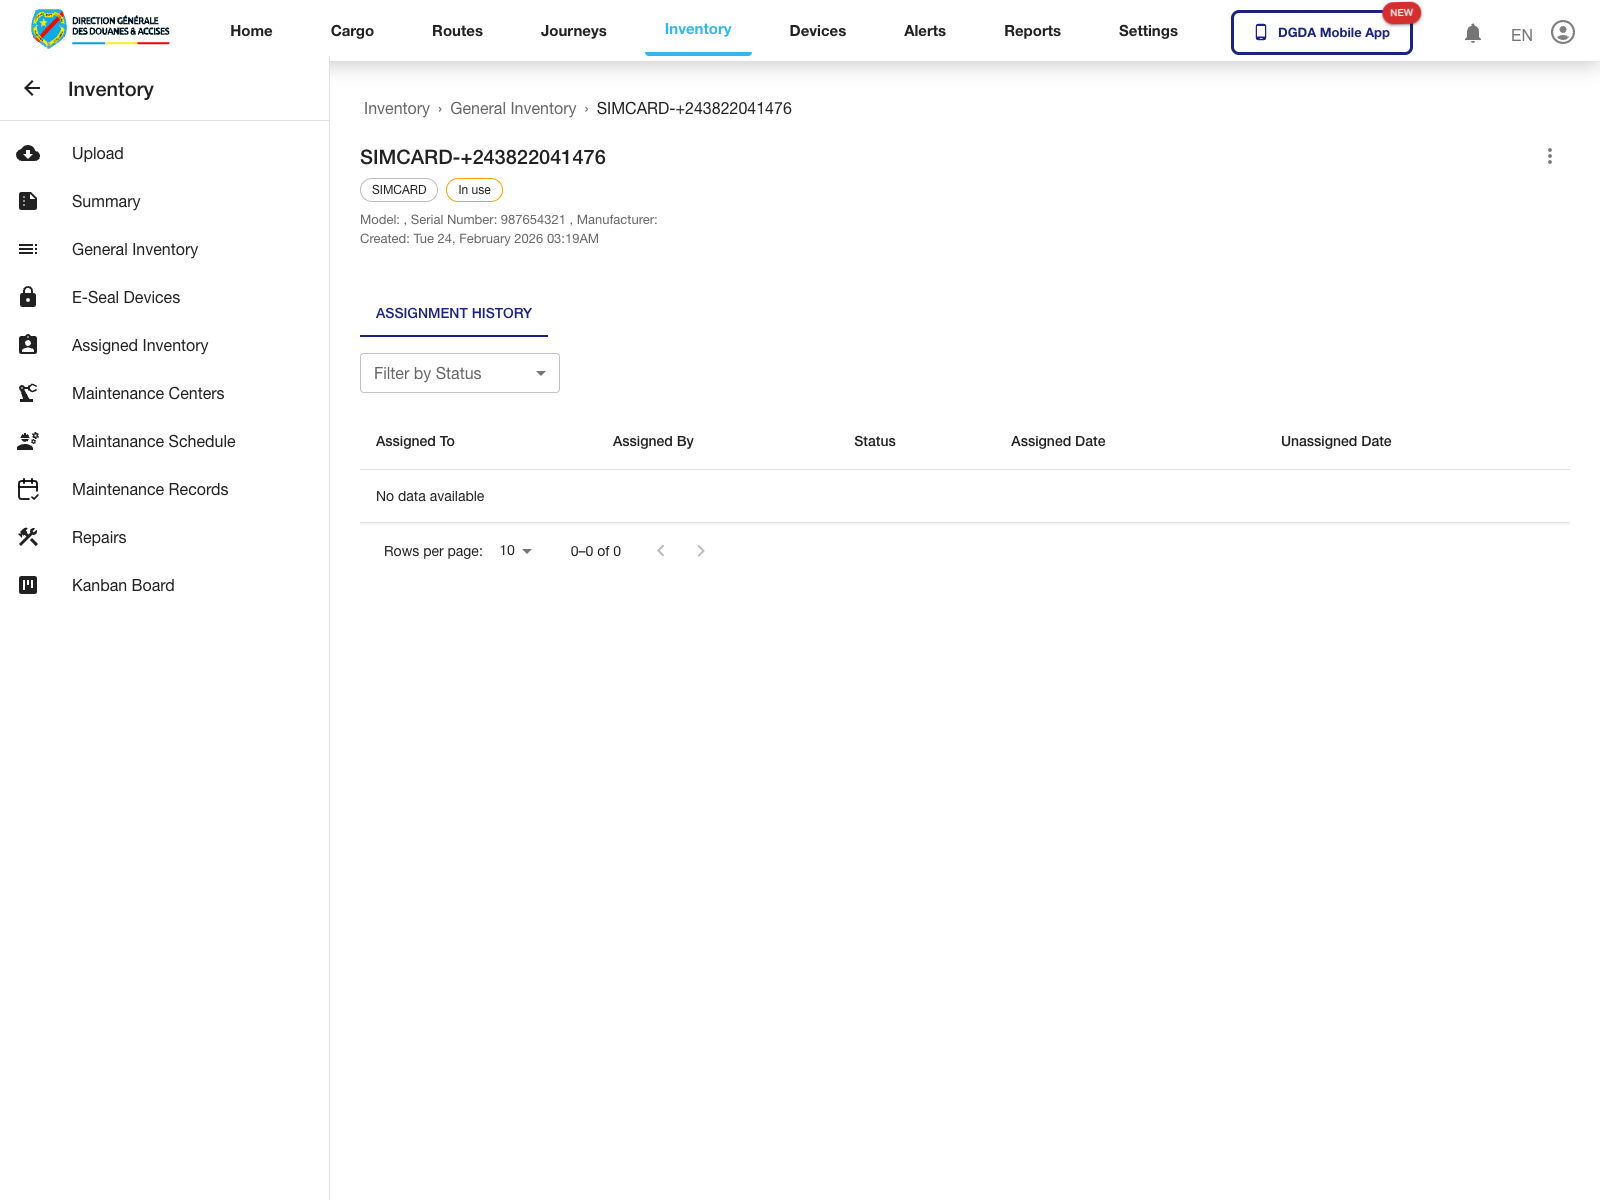
4. View Inventory Item Detail
Purpose: Open the detail screen for a specific inventory item.
Route / context: /inventories/inventory -> /inventories/view-inventory/:id
Steps:
- Open the inventory row action menu.
- Select View.
- Wait for the detail page to load.
- Review the item summary and any assignment history shown on the page.
Expected result: The portal opens the dedicated inventory detail page for the selected record.
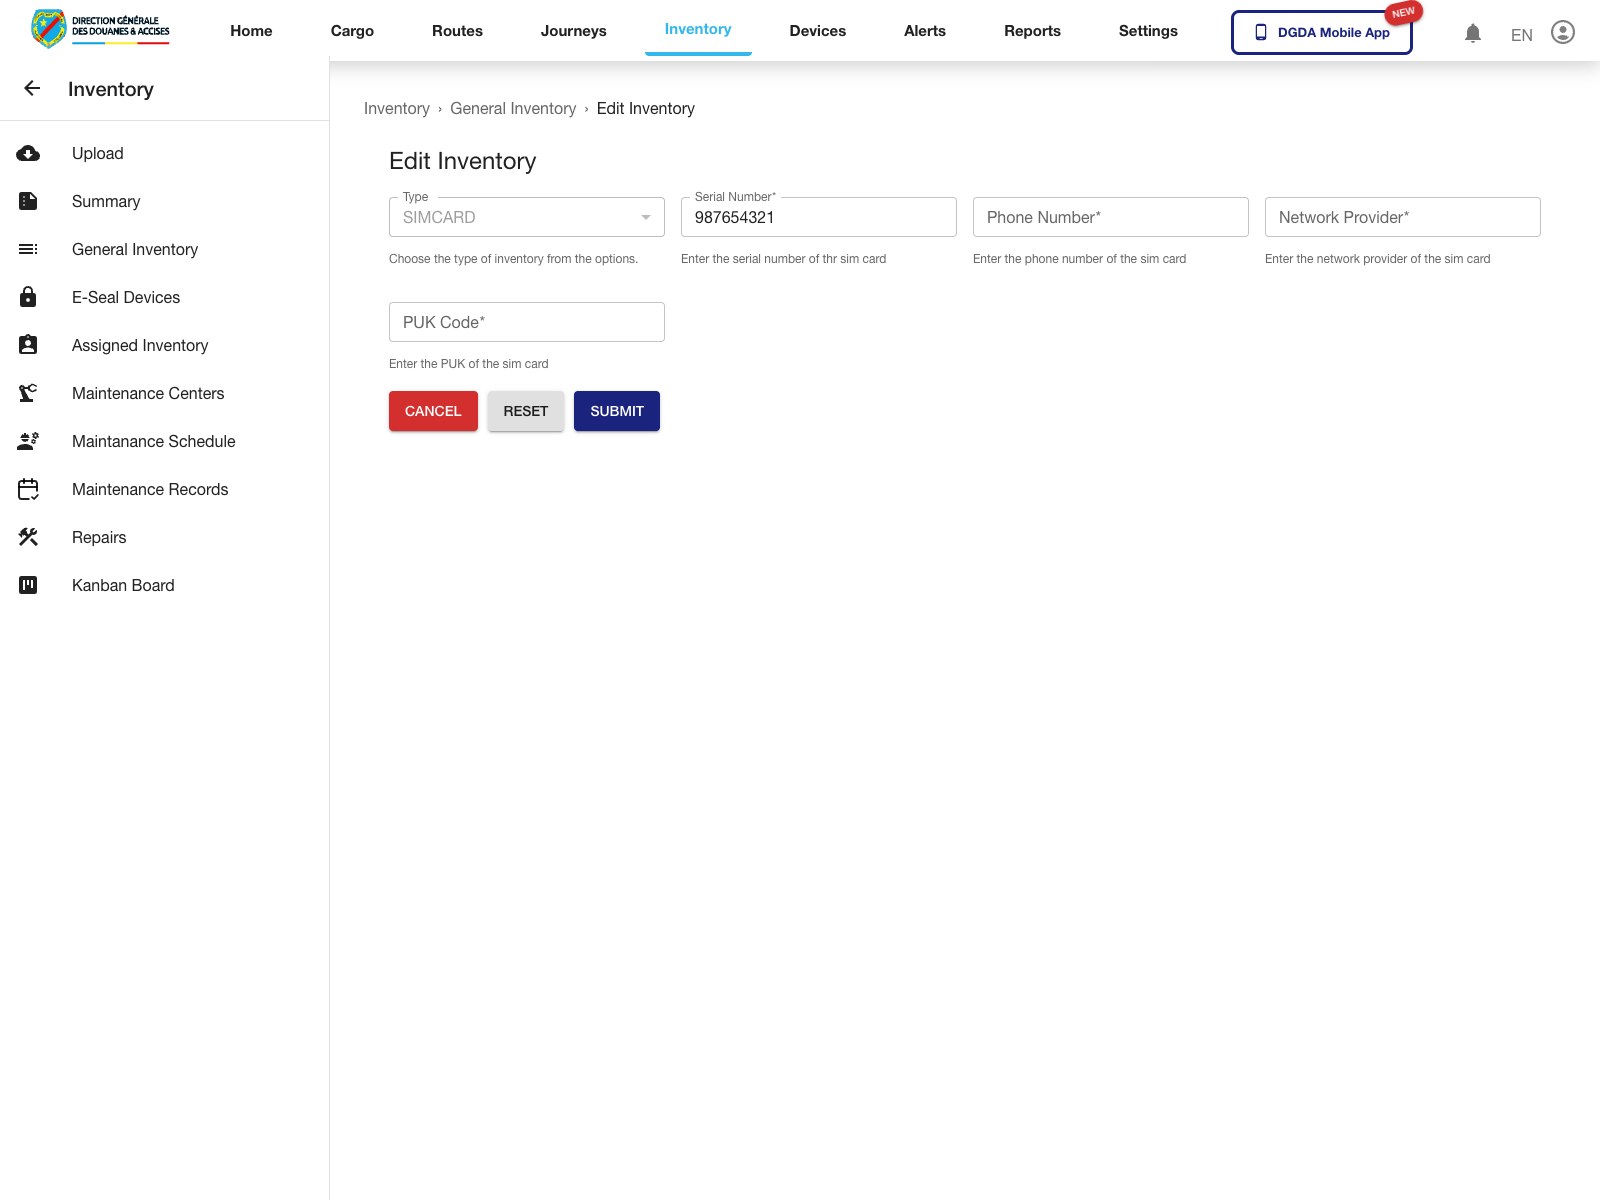
5. Edit an Inventory Item
Purpose: Update the administrative details of an existing inventory record.
Route / context: /inventories/inventory -> /inventories/edit-inventory/:id
Steps:
- Open the inventory row action menu.
- Select Edit.
- Review the inventory form fields.
- Update the values that need to change.
- Use Update when the record is ready to be saved.
Expected result: The inventory edit form opens for the selected item.
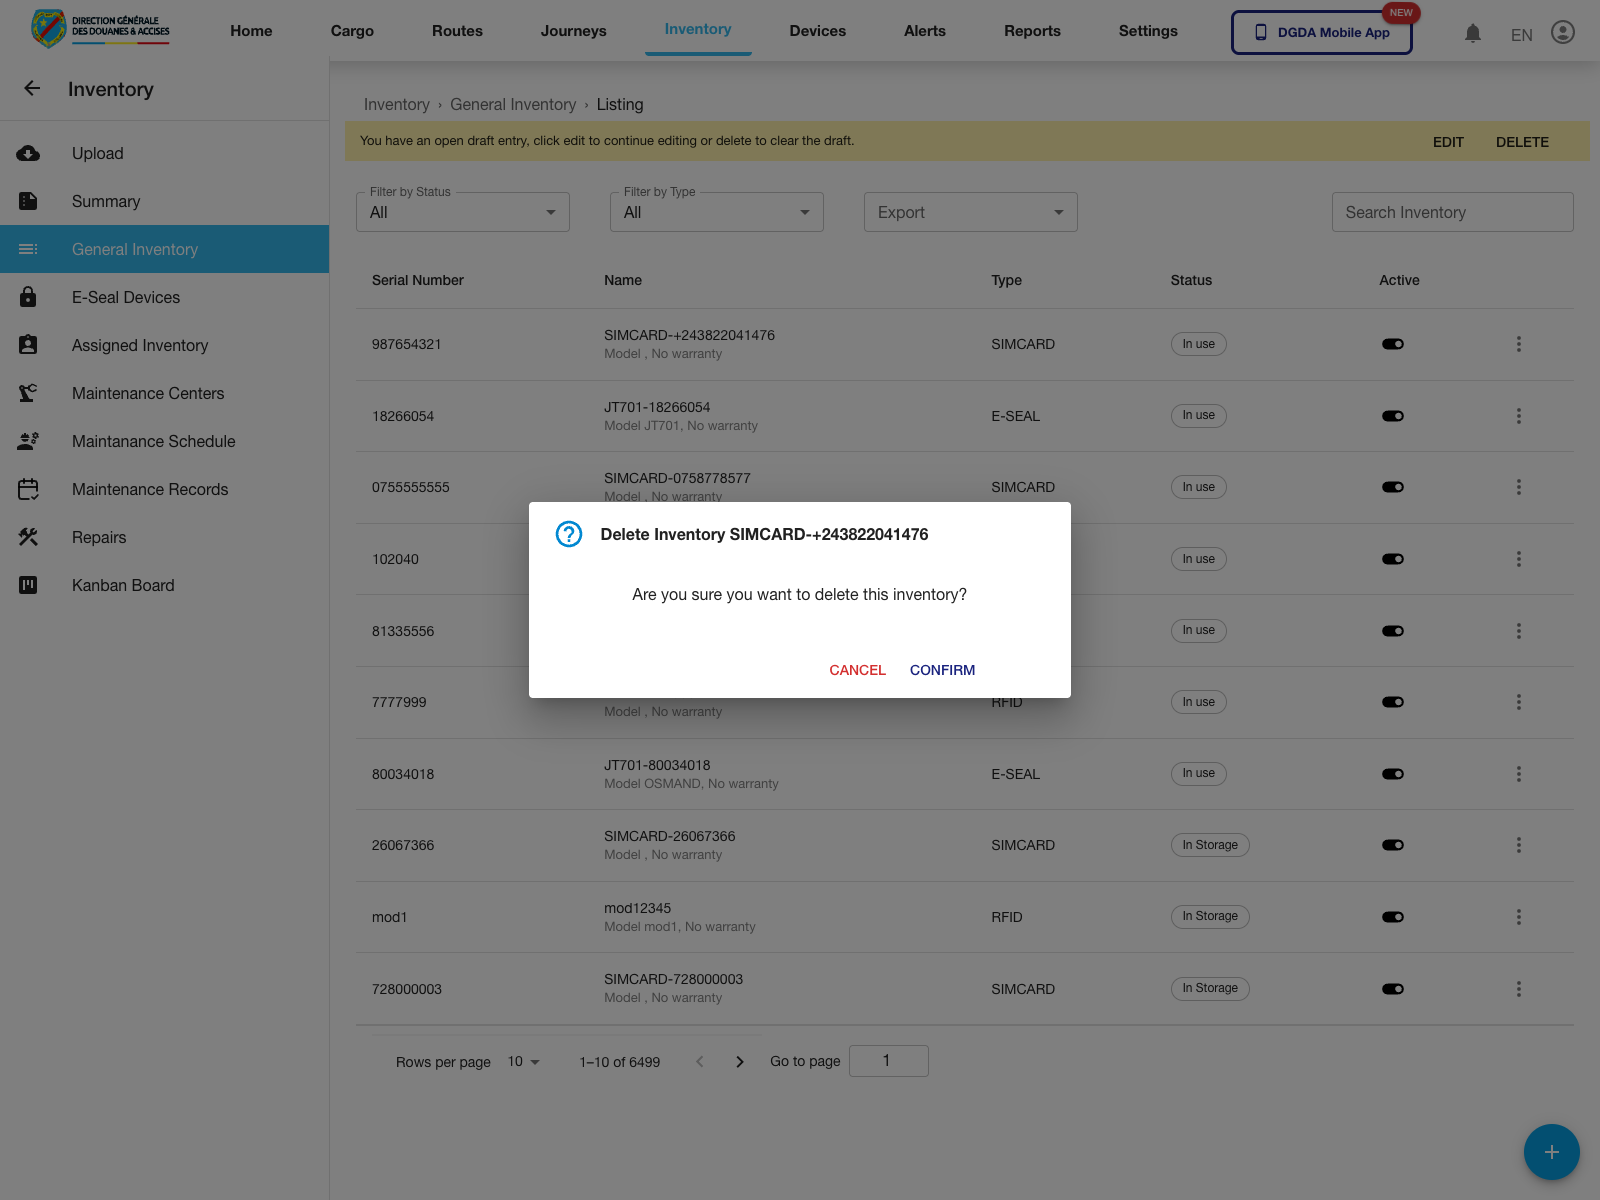
6. Start Inventory Deletion
Purpose: Begin the delete workflow for an inventory item without committing the deletion.
Route / context: /inventories/inventory -> row actions -> Delete
Steps:
- Open the inventory row action menu.
- Select Delete.
- Review the confirmation dialog.
- Use Confirm to proceed or Cancel to stop.
Expected result: The delete confirmation dialog opens and requires explicit approval before the item is removed.
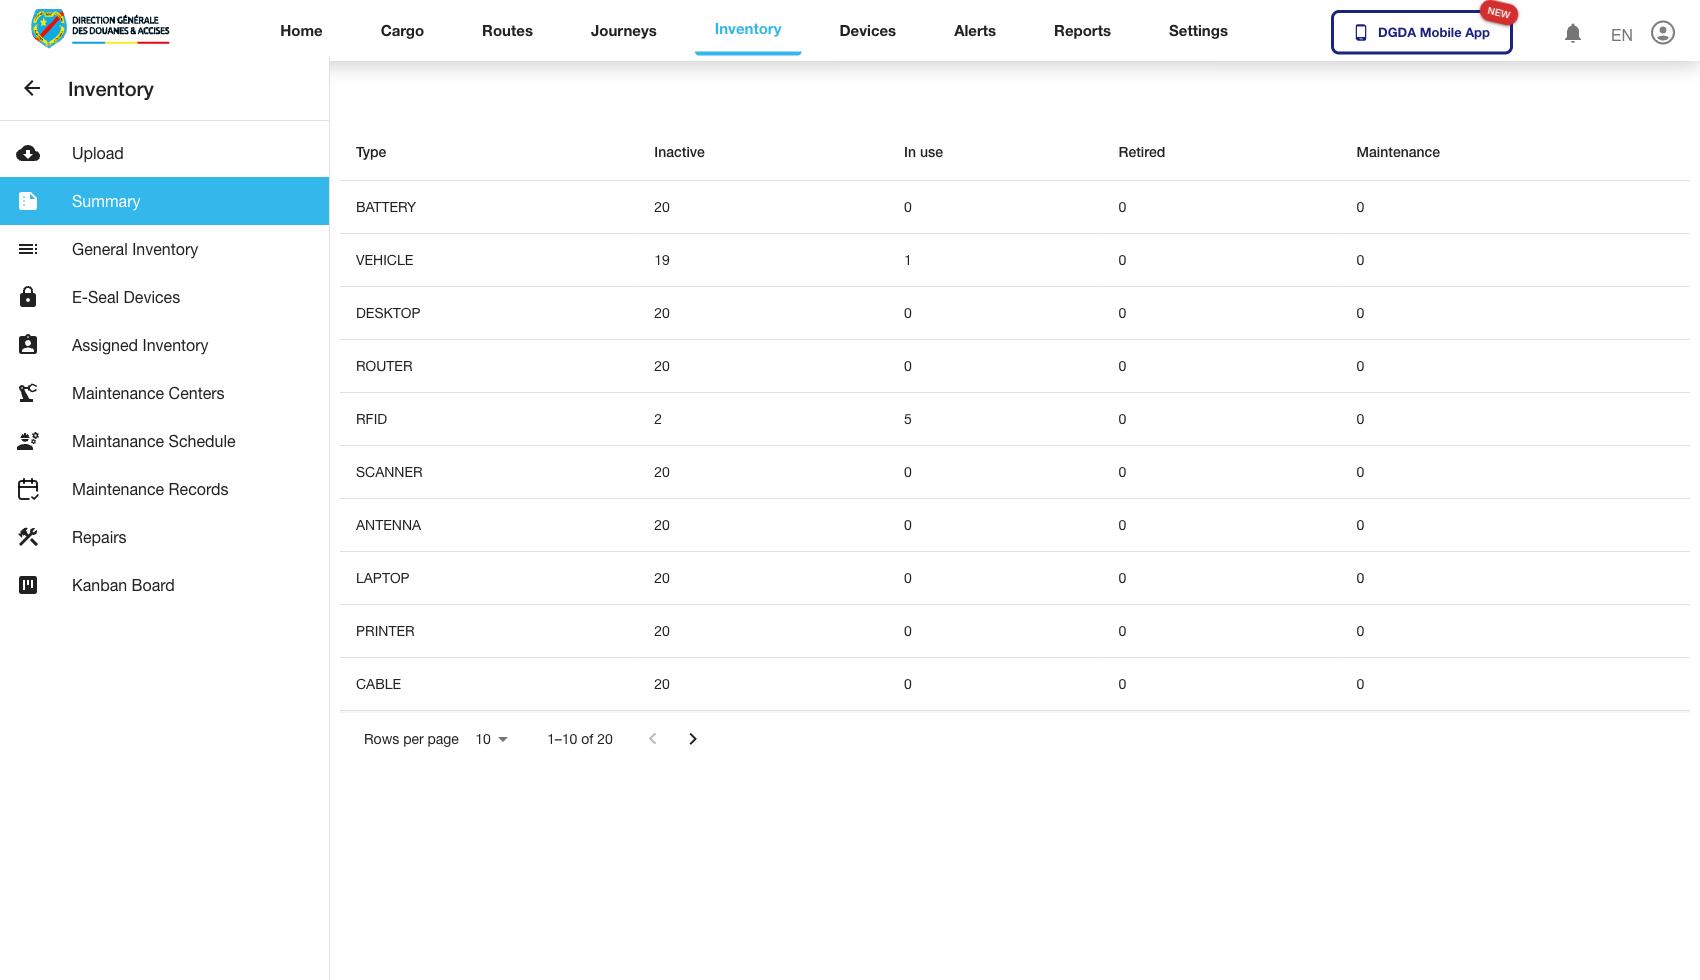
7. Review Inventory Summary
Purpose: Check aggregate inventory status rather than item-by-item detail.
Route / context: /inventories/inventory-summary
Steps:
- Stay in the Inventory module.
- Open Summary.
- Review the high-level inventory distribution.
- Use this page when you need quick operational visibility rather than detailed line-by-line review.
Expected result: The summary page presents an aggregate view of inventory condition or distribution.
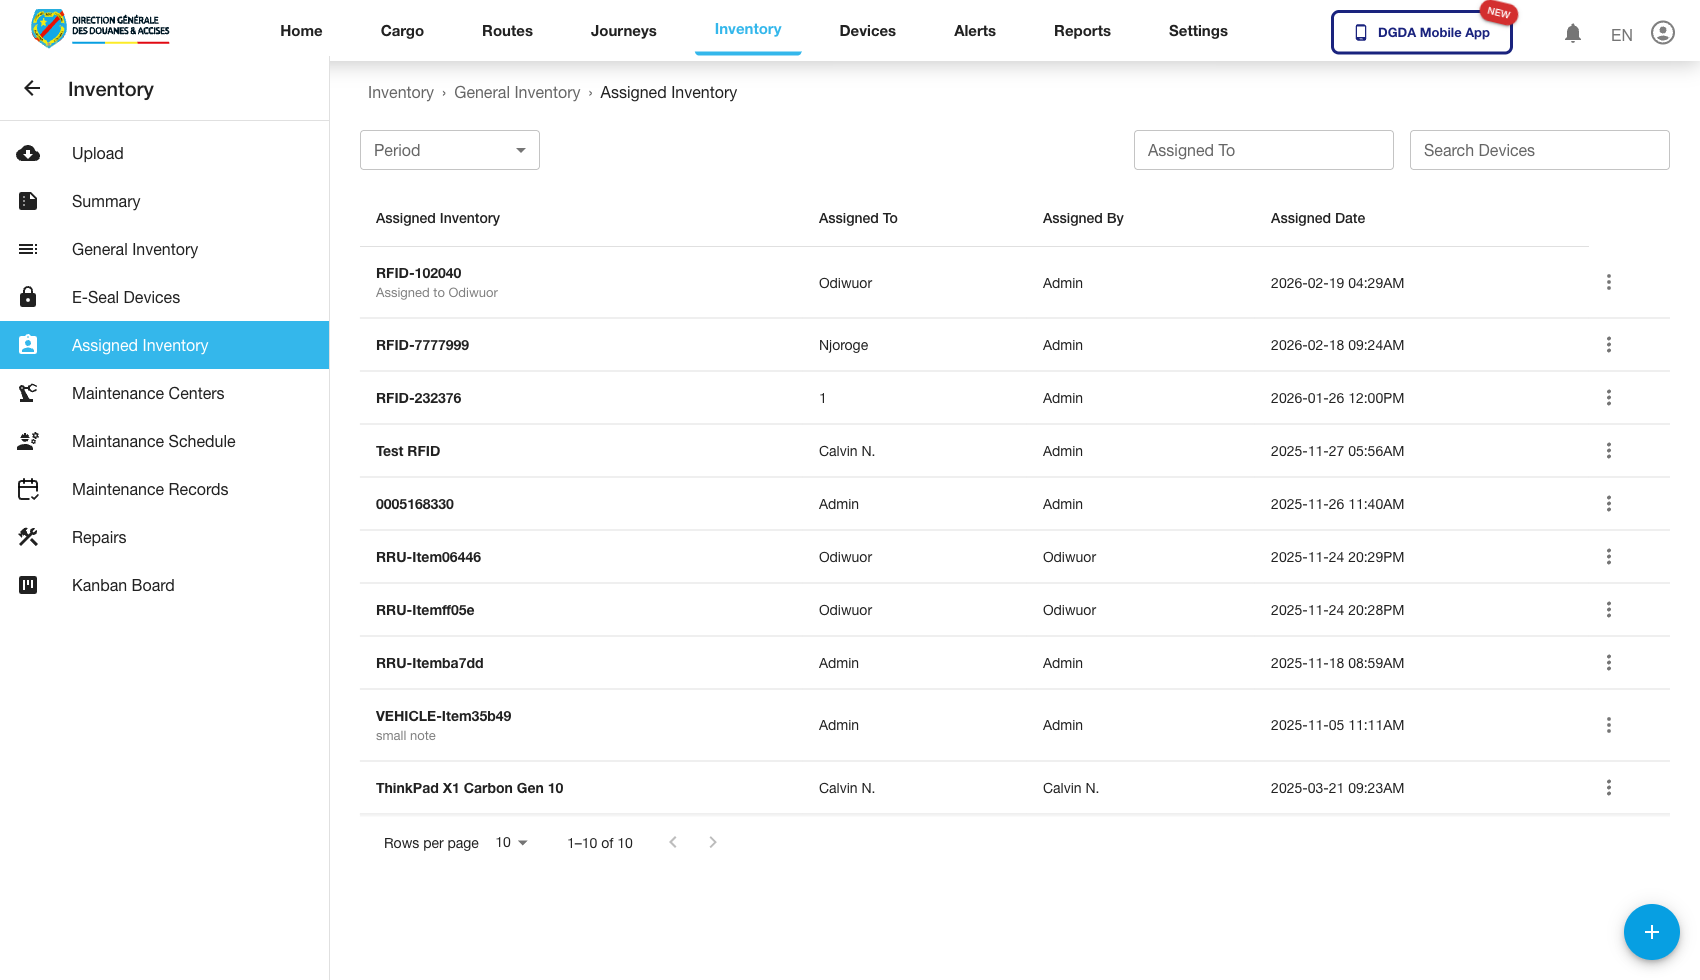
8. Review Assigned Inventory
Purpose: Identify stock items already assigned into operational use.
Route / context: /inventories/assigned-inventory
Steps:
- Open Assigned Inventory.
- Review the current assigned records.
- Confirm the assignment state aligns with current operational expectations.
Expected result: Assigned items are visible separately from the full inventory register.
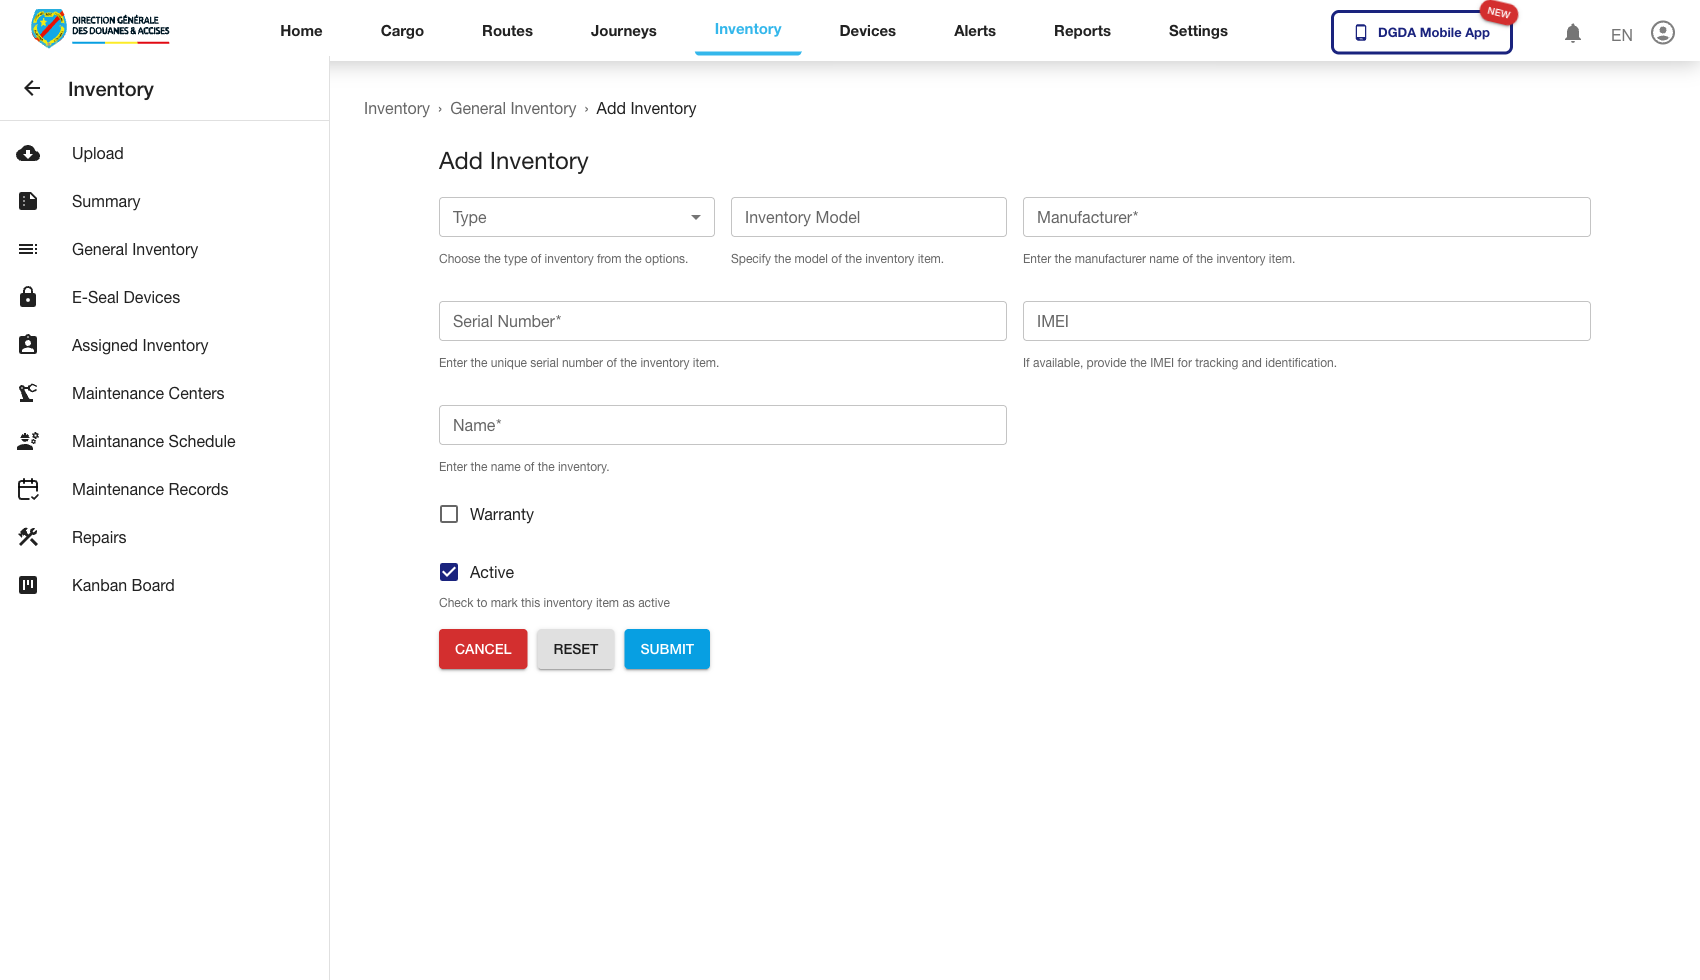
9. Add Inventory
Purpose: Register a new inventory item.
Route / context: /inventories/add-inventory
Steps:
- Open Add Inventory.
- Complete the required form fields.
- Save the new record.
- Confirm the item becomes visible in the appropriate inventory views.
Expected result: A new inventory record is successfully created and available for later assignment or tracking.
10. Related Maintenance Area
Inventory also exposes a maintenance operations area that includes maintenance centers, schedules, records, repairs, and the maintenance kanban board.
See Maintenance for the validated maintenance workflows captured from the live portal.