Alerts
This section focuses on the alert-monitoring views and action entry points validated in live capture. It covers how operators review alert queues, inspect an individual alert, and begin escalation or closure workflows.
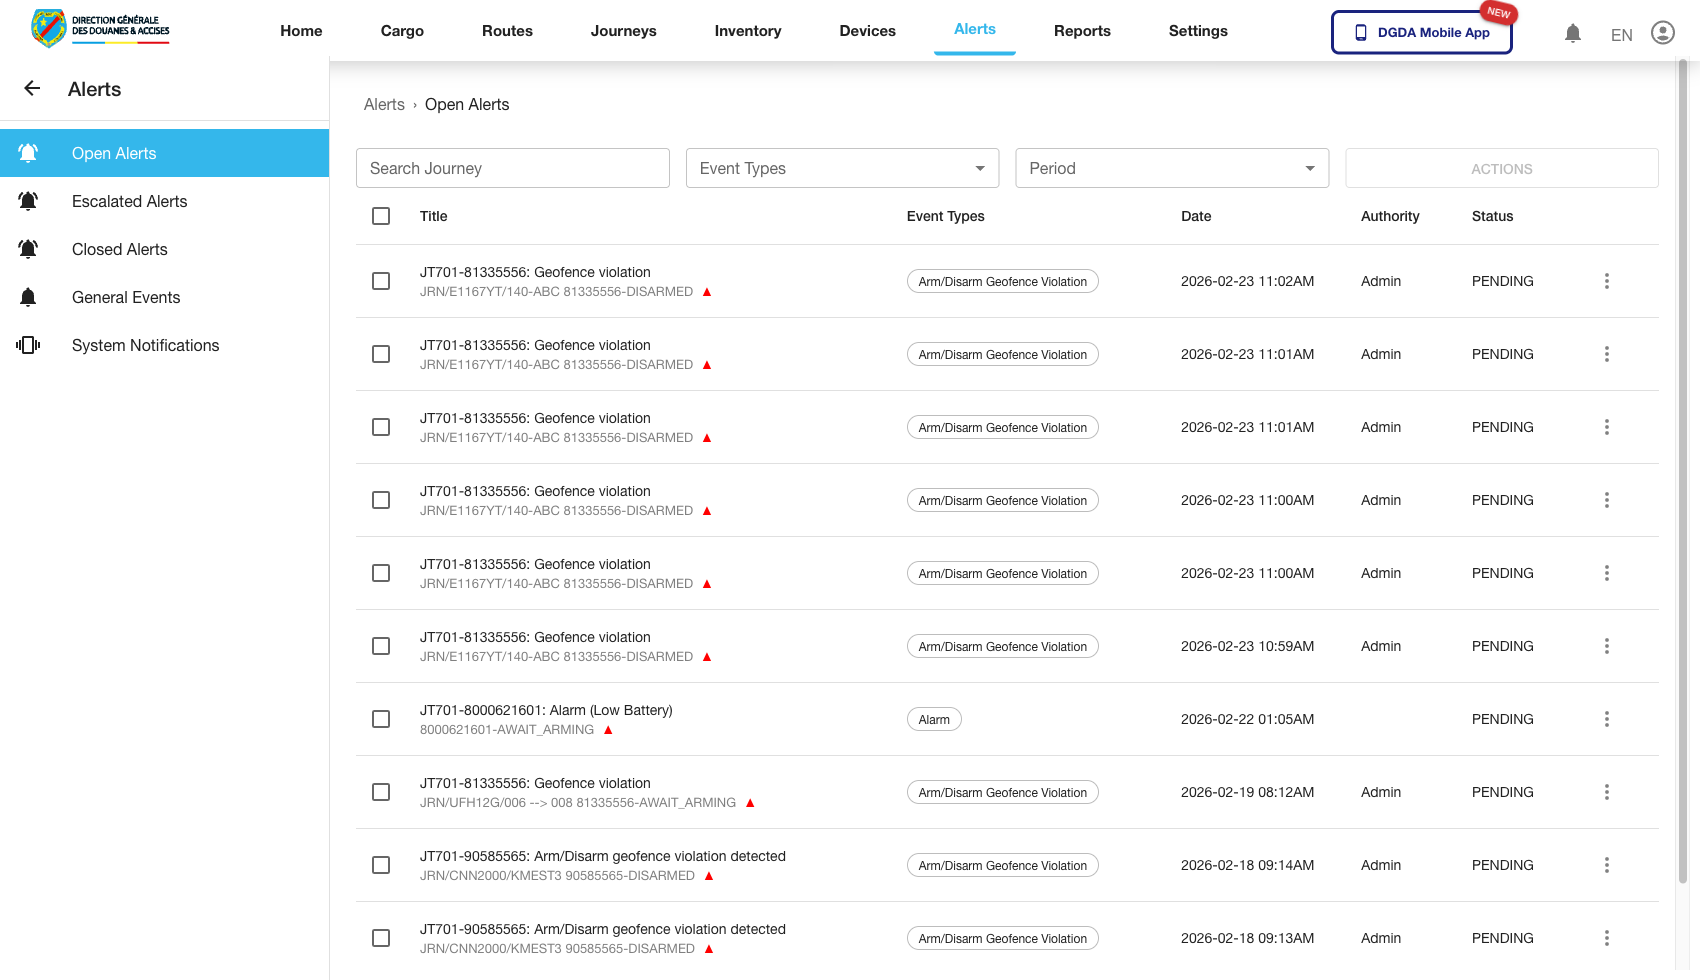
1. Review Open Alerts
Purpose: Identify alerts that still require active operator attention.
Route / context: /alerts/open-alerts
Steps:
- Open Alerts from the top navigation.
- Select Open Alerts from the left navigation.
- Review the current queue for unresolved records.
- Use search or filters to narrow the view when many alerts are present.
- Open the relevant row action if deeper investigation is required.
Expected result: The table shows unresolved alerts with current operational context and allows the operator to begin investigation.
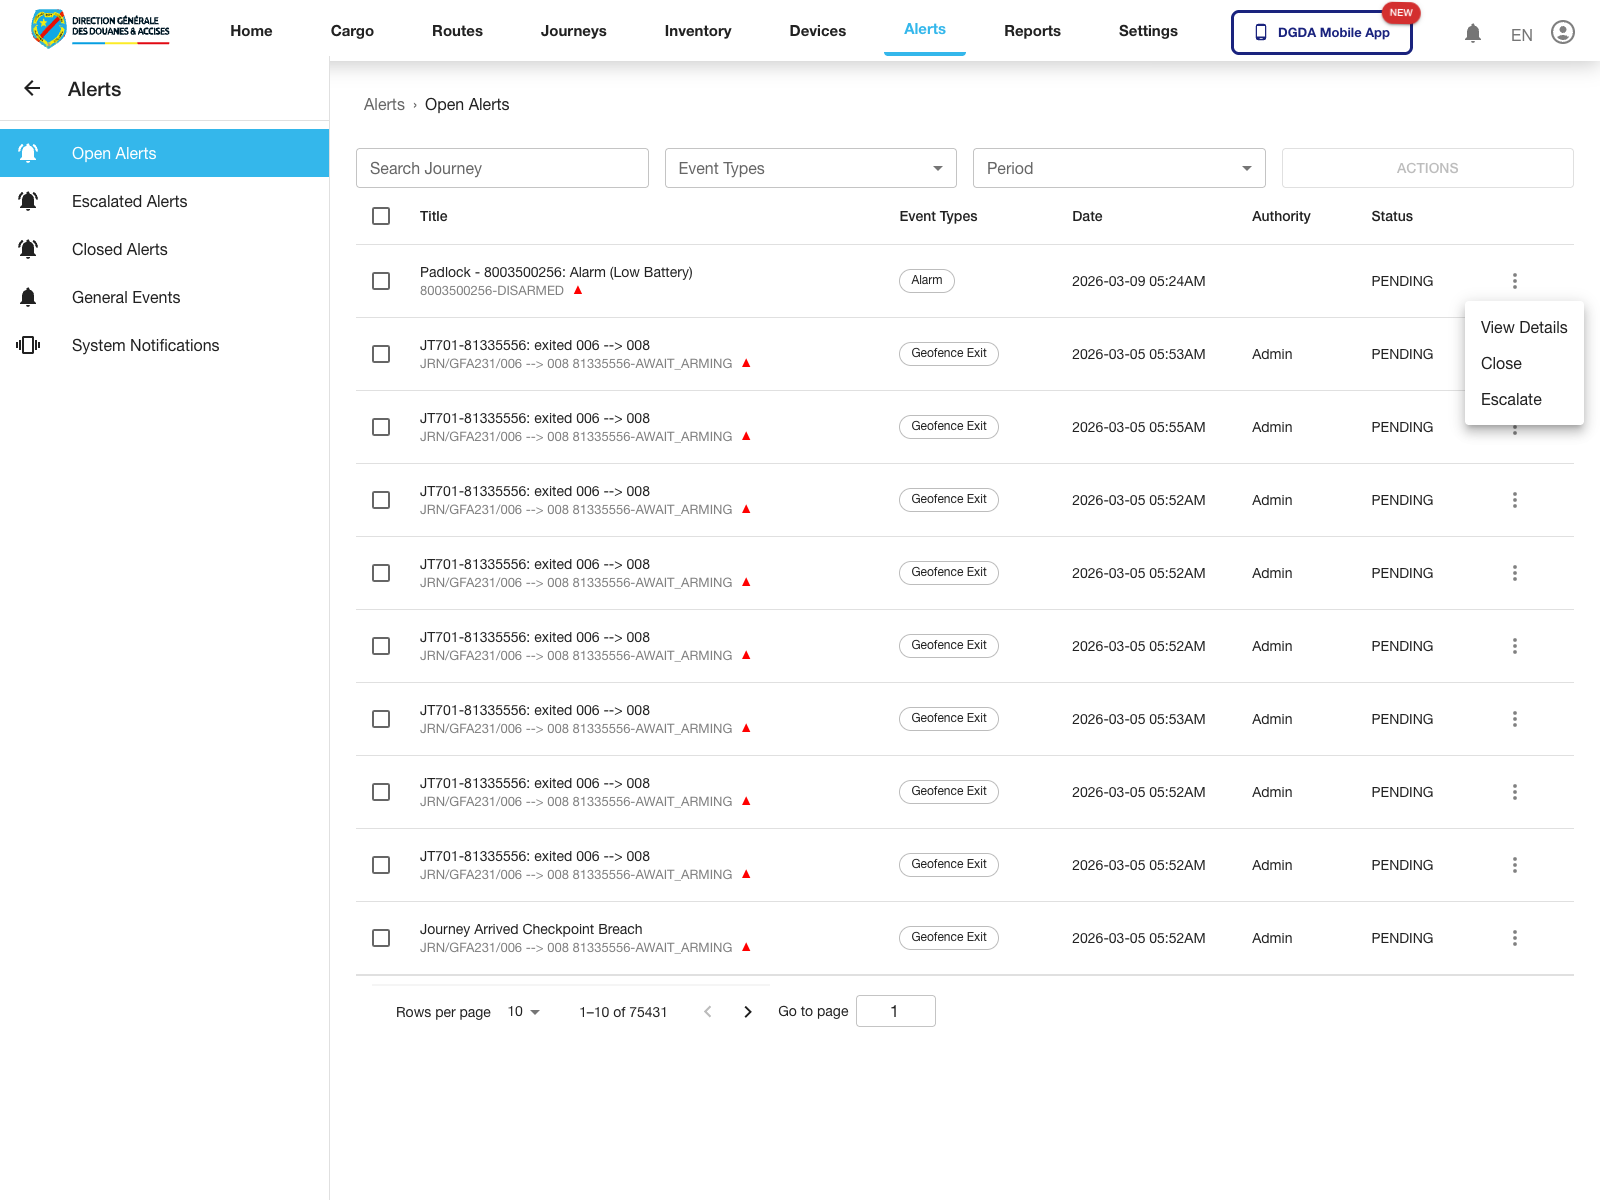
2. Open the Alert Actions Menu
Purpose: Expose the row-level actions available for an alert in the open queue.
Route / context: /alerts/open-alerts
Steps:
- Open Open Alerts.
- Locate the alert row you need to inspect.
- Click the row action button at the far right of the row.
- Review the available actions before proceeding.
Expected result: The row menu opens and shows the validated alert actions for that record.
Observed live actions: View Details, Close, and Escalate.
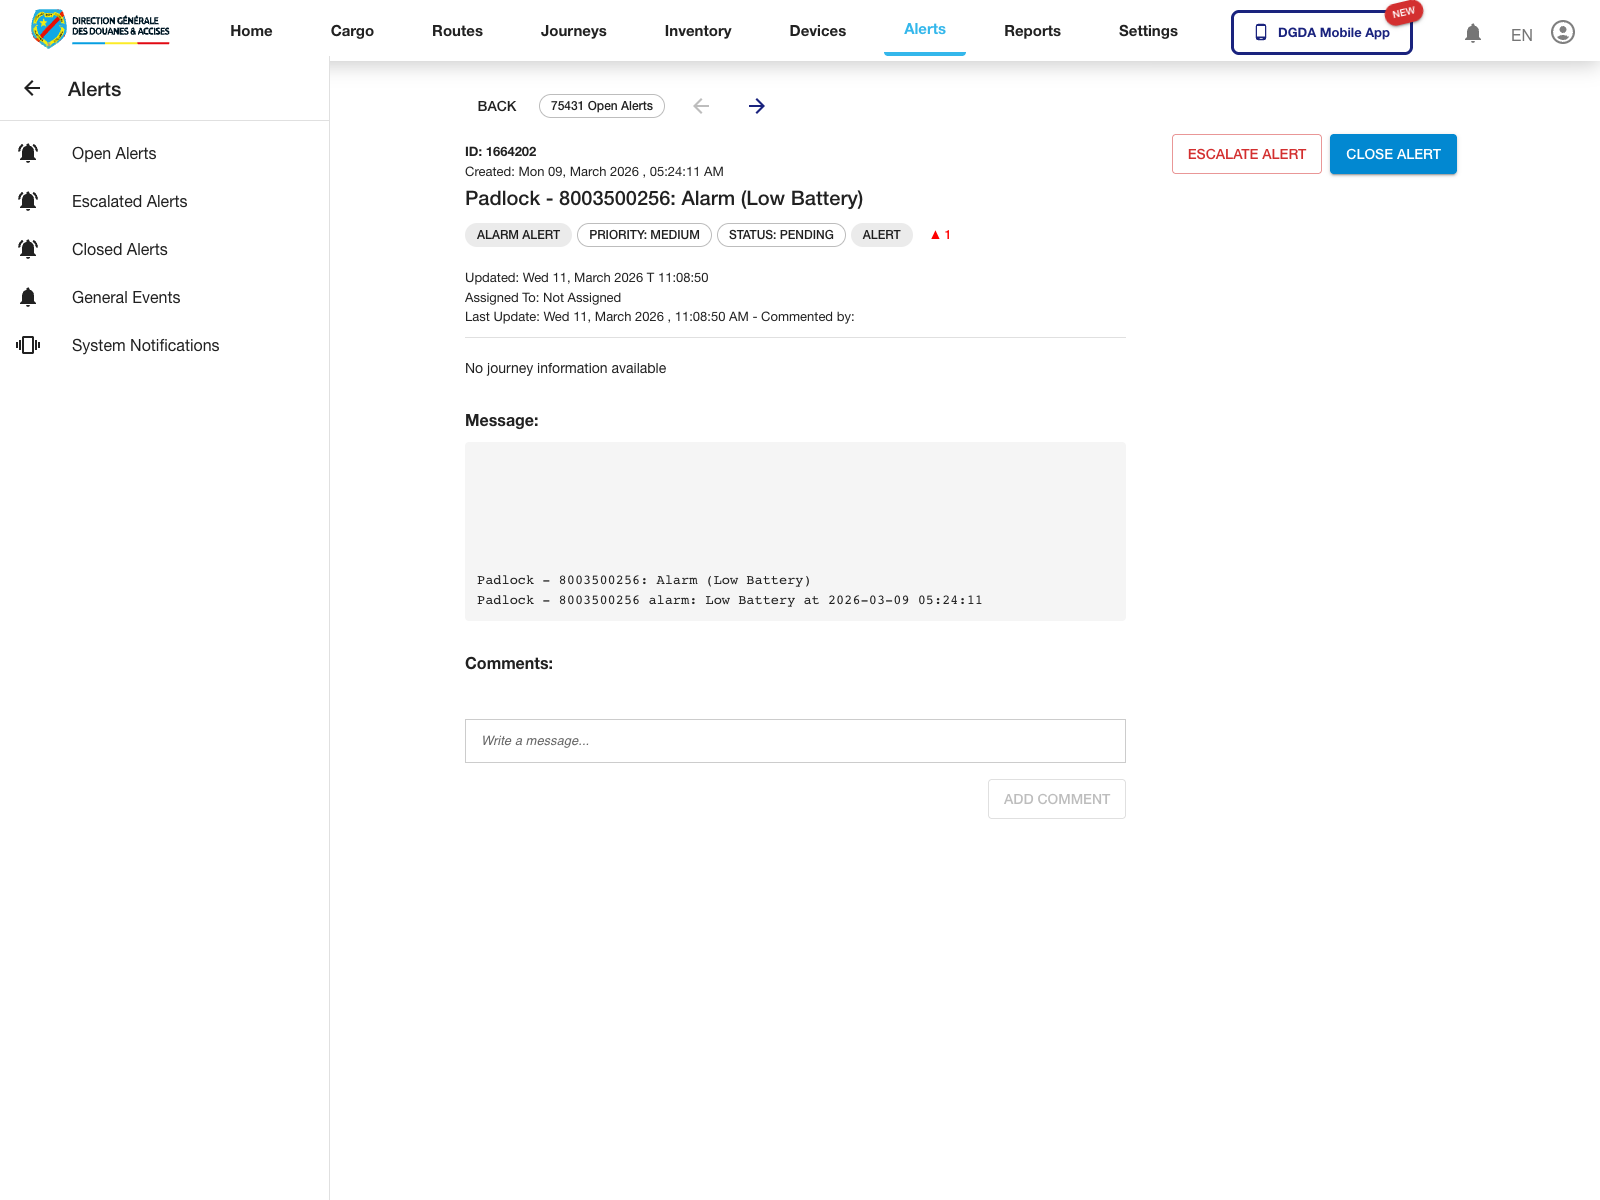
3. Open Alert Details
Purpose: Move from the alert queue into the full detail page for one alert.
Route / context: /alerts/open-alerts -> /alerts/alert-details/:id
Steps:
- Open the row action menu for the alert of interest.
- Select View Details.
- Wait for the detail page to load.
- Review the alert status, alert summary, and the available response actions on the detail screen.
Expected result: The portal opens the dedicated alert detail page and exposes the alert-level action buttons.
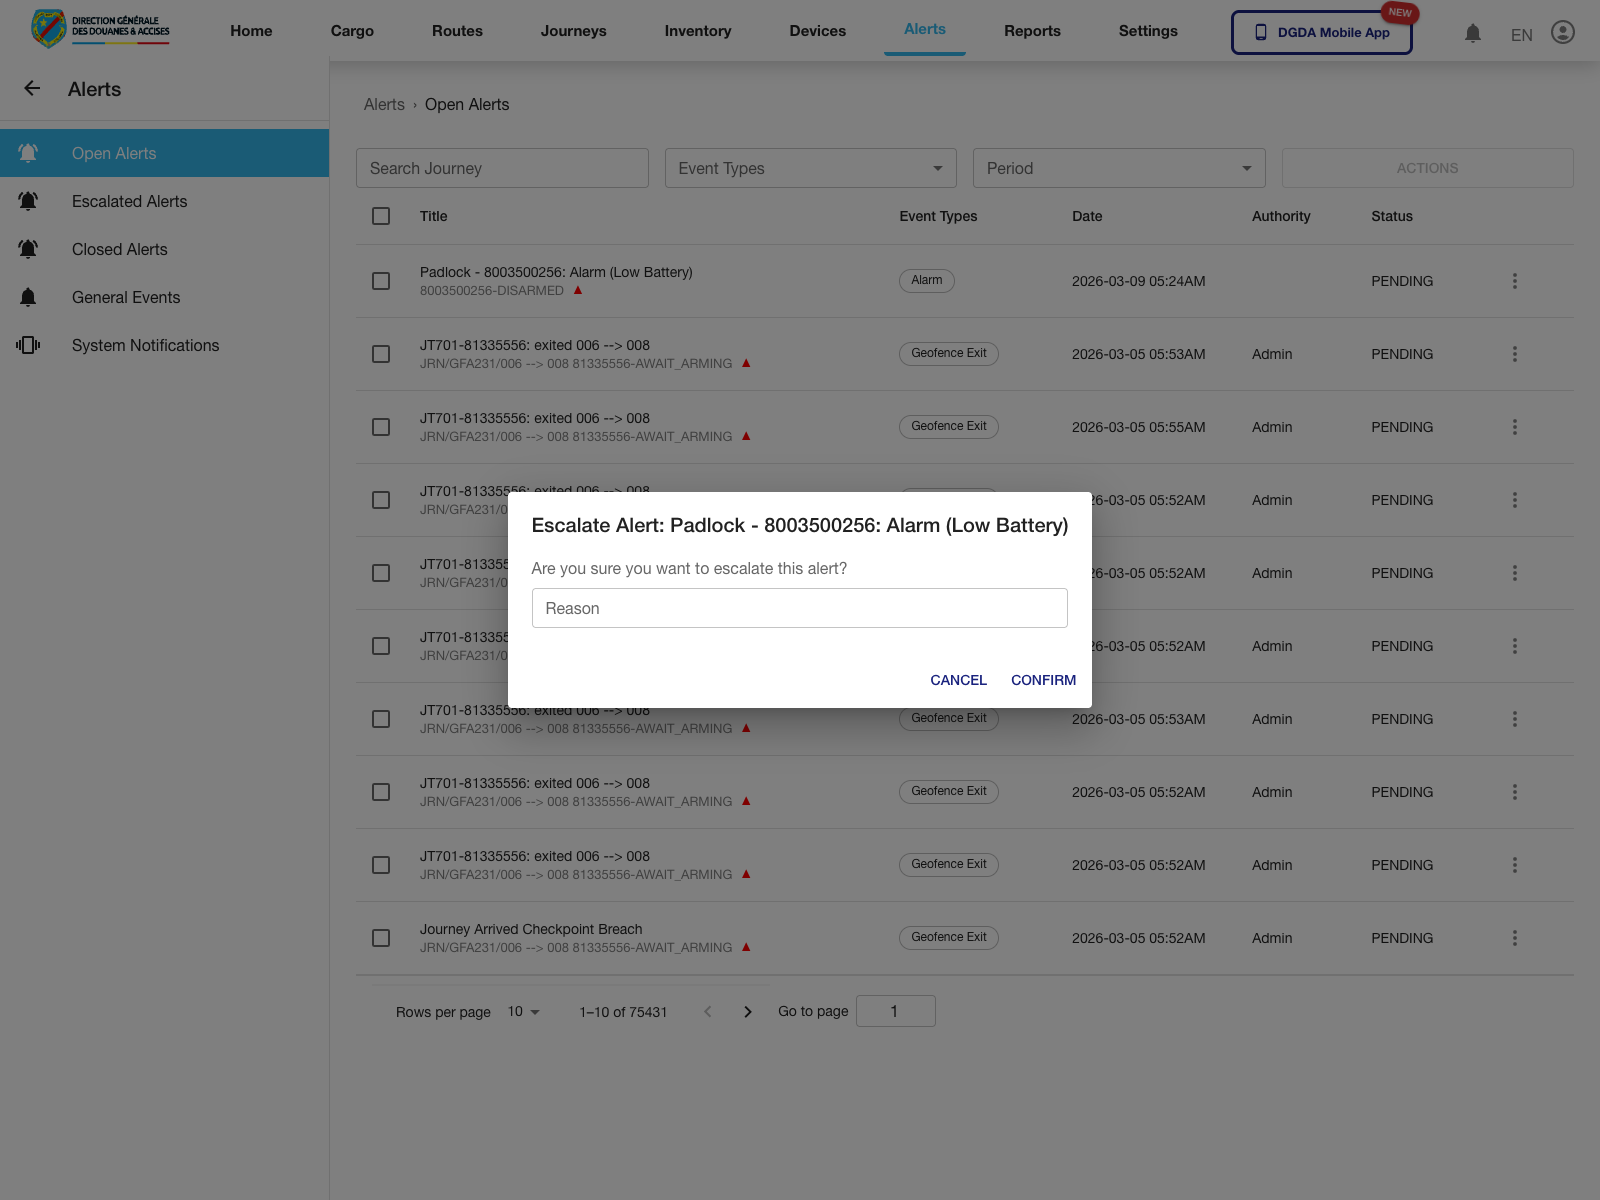
4. Start an Alert Escalation
Purpose: Begin the escalation workflow for an open alert without immediately committing the change.
Route / context: /alerts/open-alerts -> row actions -> Escalate
Steps:
- Open the row action menu for the alert to escalate.
- Select Escalate.
- Review the confirmation dialog.
- Enter the escalation reason when the workflow requires it.
- Use Confirm to proceed or Cancel to stop.
Expected result: The escalation dialog opens and requests an explicit operator confirmation before the alert is escalated.
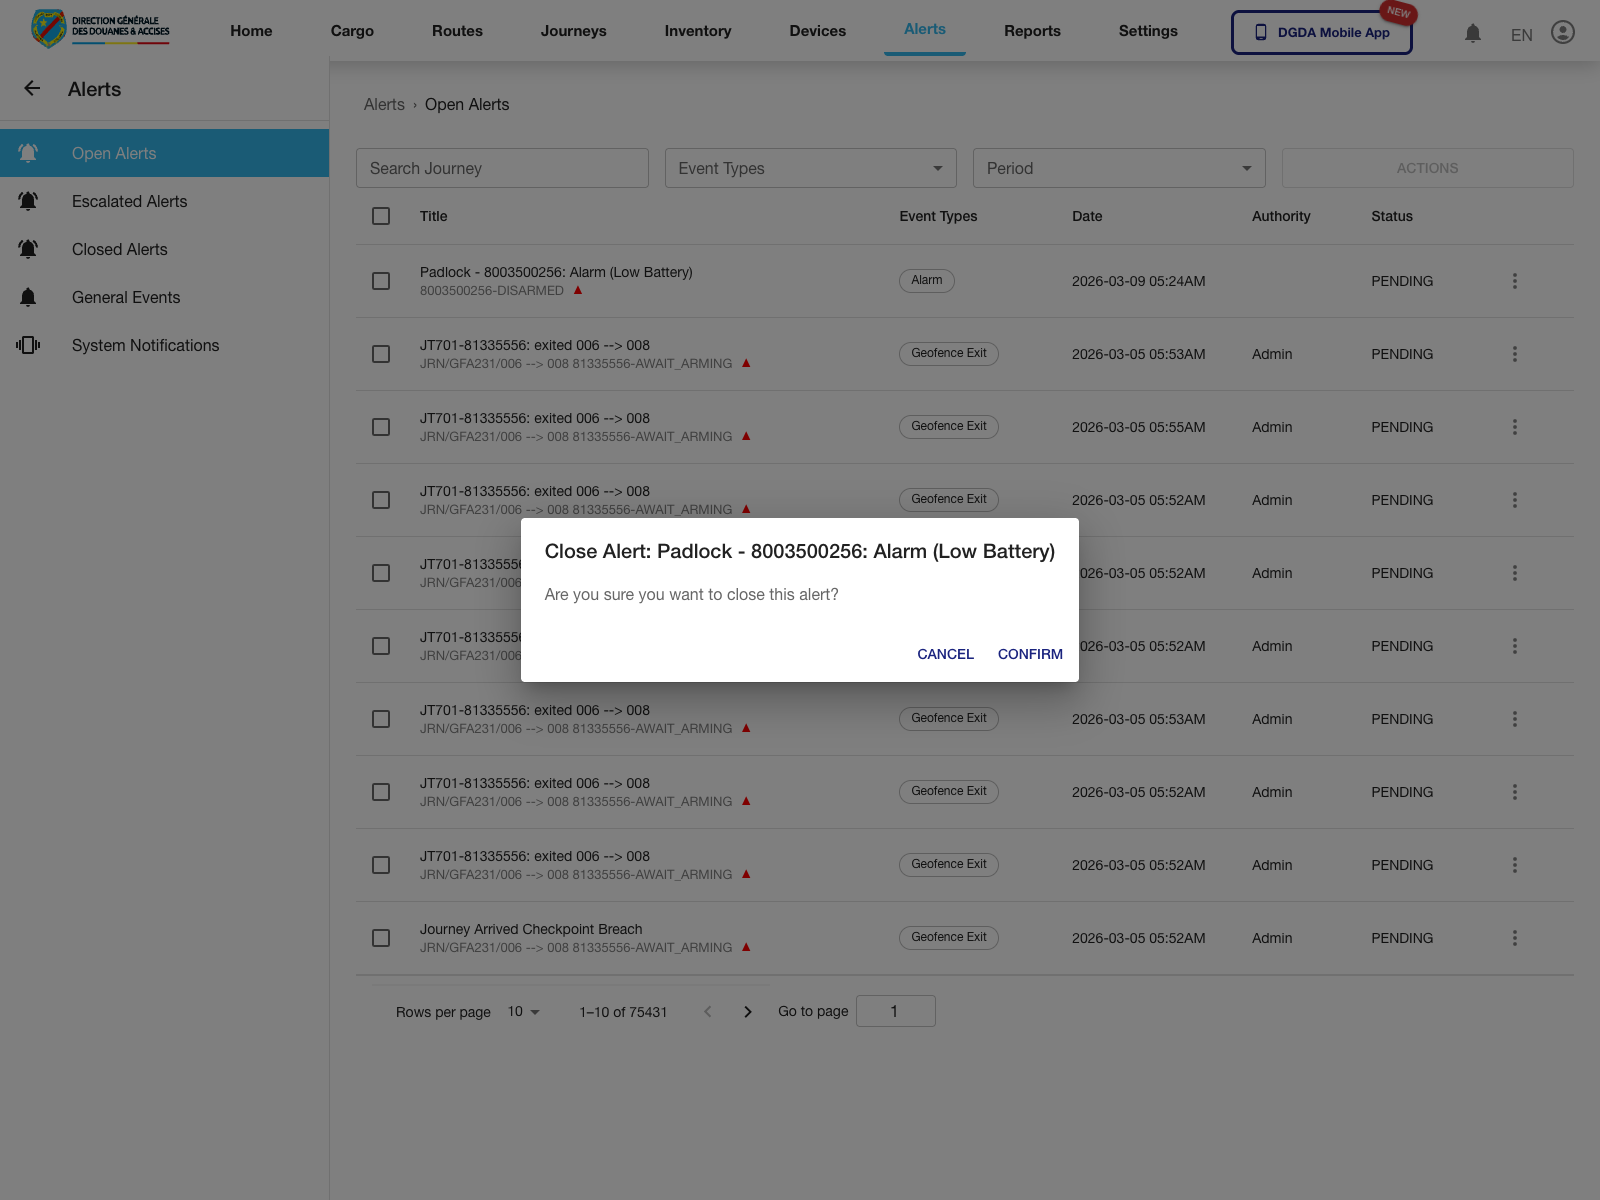
5. Start an Alert Closure
Purpose: Begin the close workflow for an alert without immediately committing the change.
Route / context: /alerts/open-alerts -> row actions -> Close
Steps:
- Open the row action menu for the alert to close.
- Select Close.
- Review the confirmation dialog.
- Use Confirm to proceed or Cancel to stop.
Expected result: The close dialog opens and requires explicit confirmation before the alert leaves the open queue.
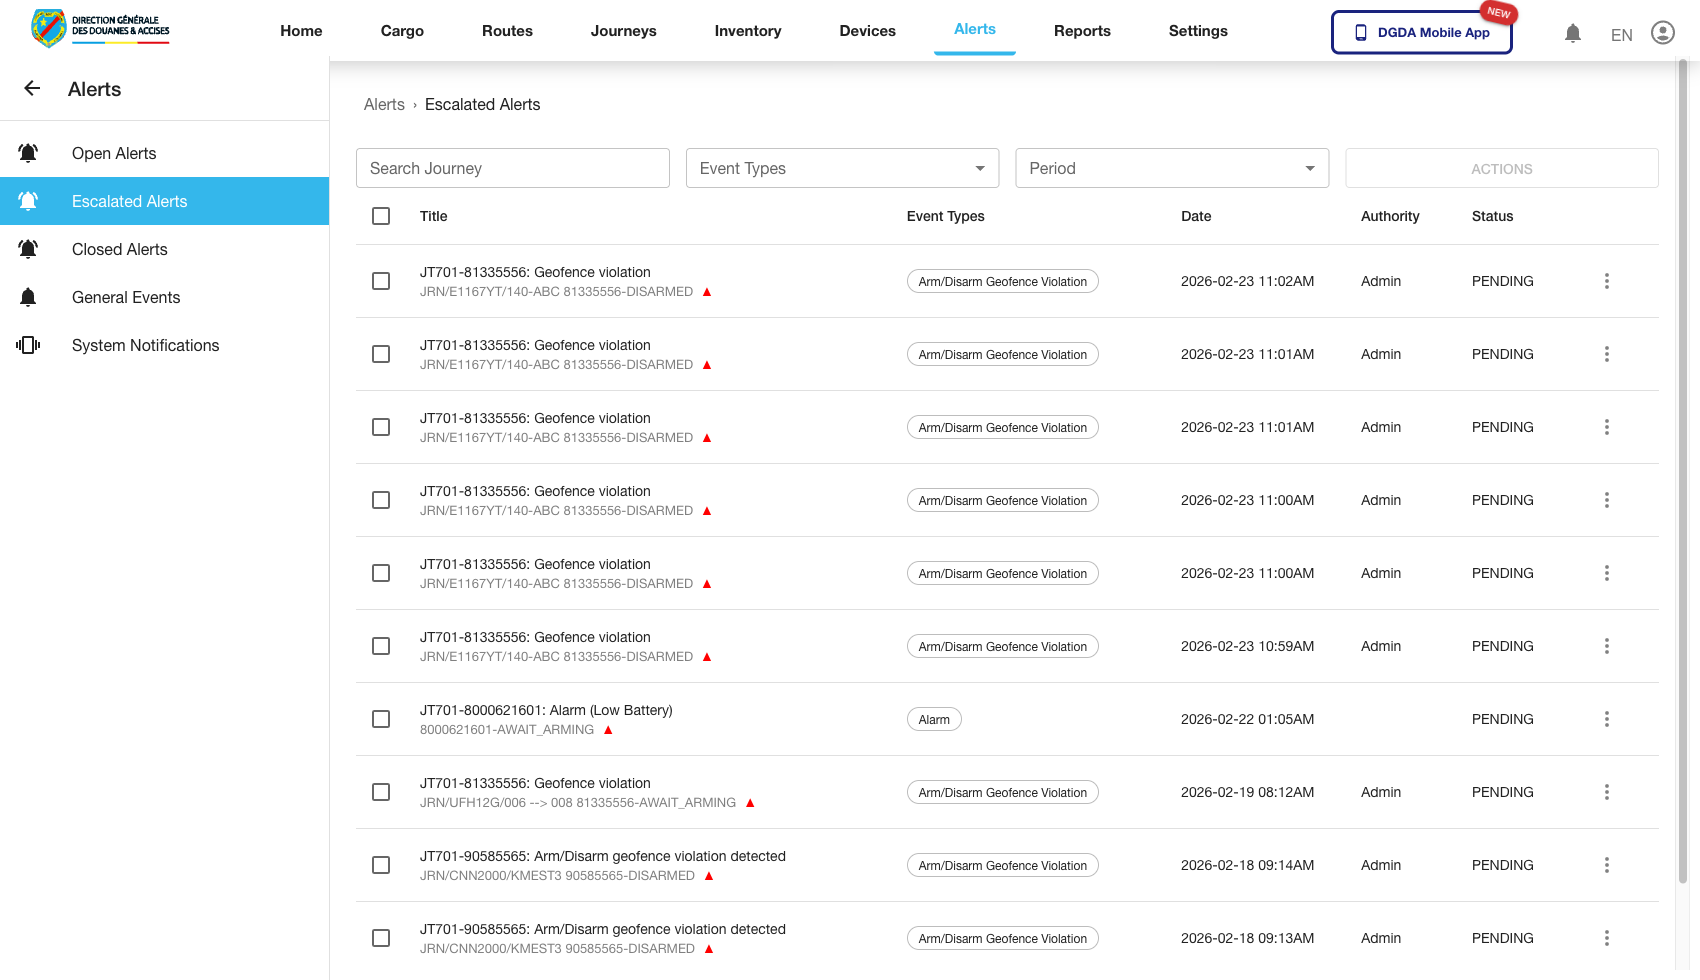
6. Review Escalated Alerts
Purpose: Track alerts that have already been elevated for stronger attention or follow-up.
Route / context: /alerts/escalated-alerts
Steps:
- Stay in the Alerts module.
- Select Escalated Alerts.
- Confirm escalated records are visible.
- Prioritize review based on severity, age, or assigned response path.
Expected result: The escalated queue isolates higher-priority alert records from the wider operational workload.
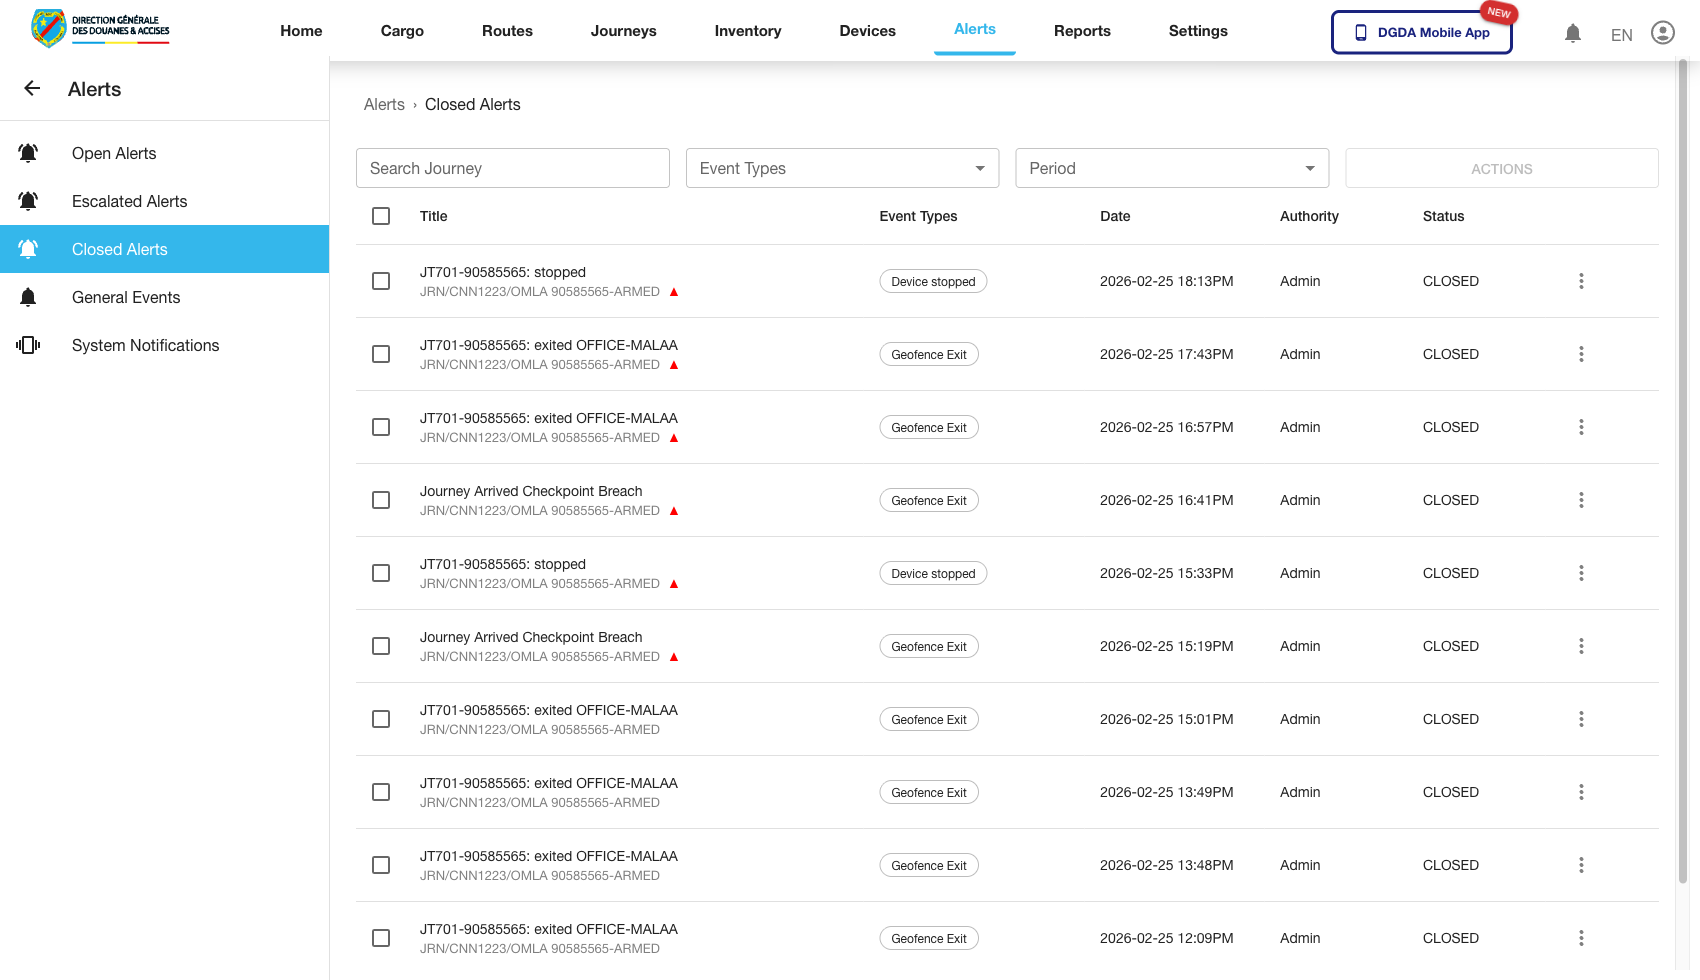
7. Review Closed Alerts
Purpose: Confirm closure history and check whether an alert has already been resolved.
Route / context: /alerts/closed-alerts
Steps:
- Open Closed Alerts in the left navigation.
- Search for the alert identifier or browse by date and state.
- Confirm the alert is no longer in the open or escalated queue.
- Review historical closure context as needed.
Expected result: Closed alerts are separated from active queues and can be used for audit or confirmation purposes.
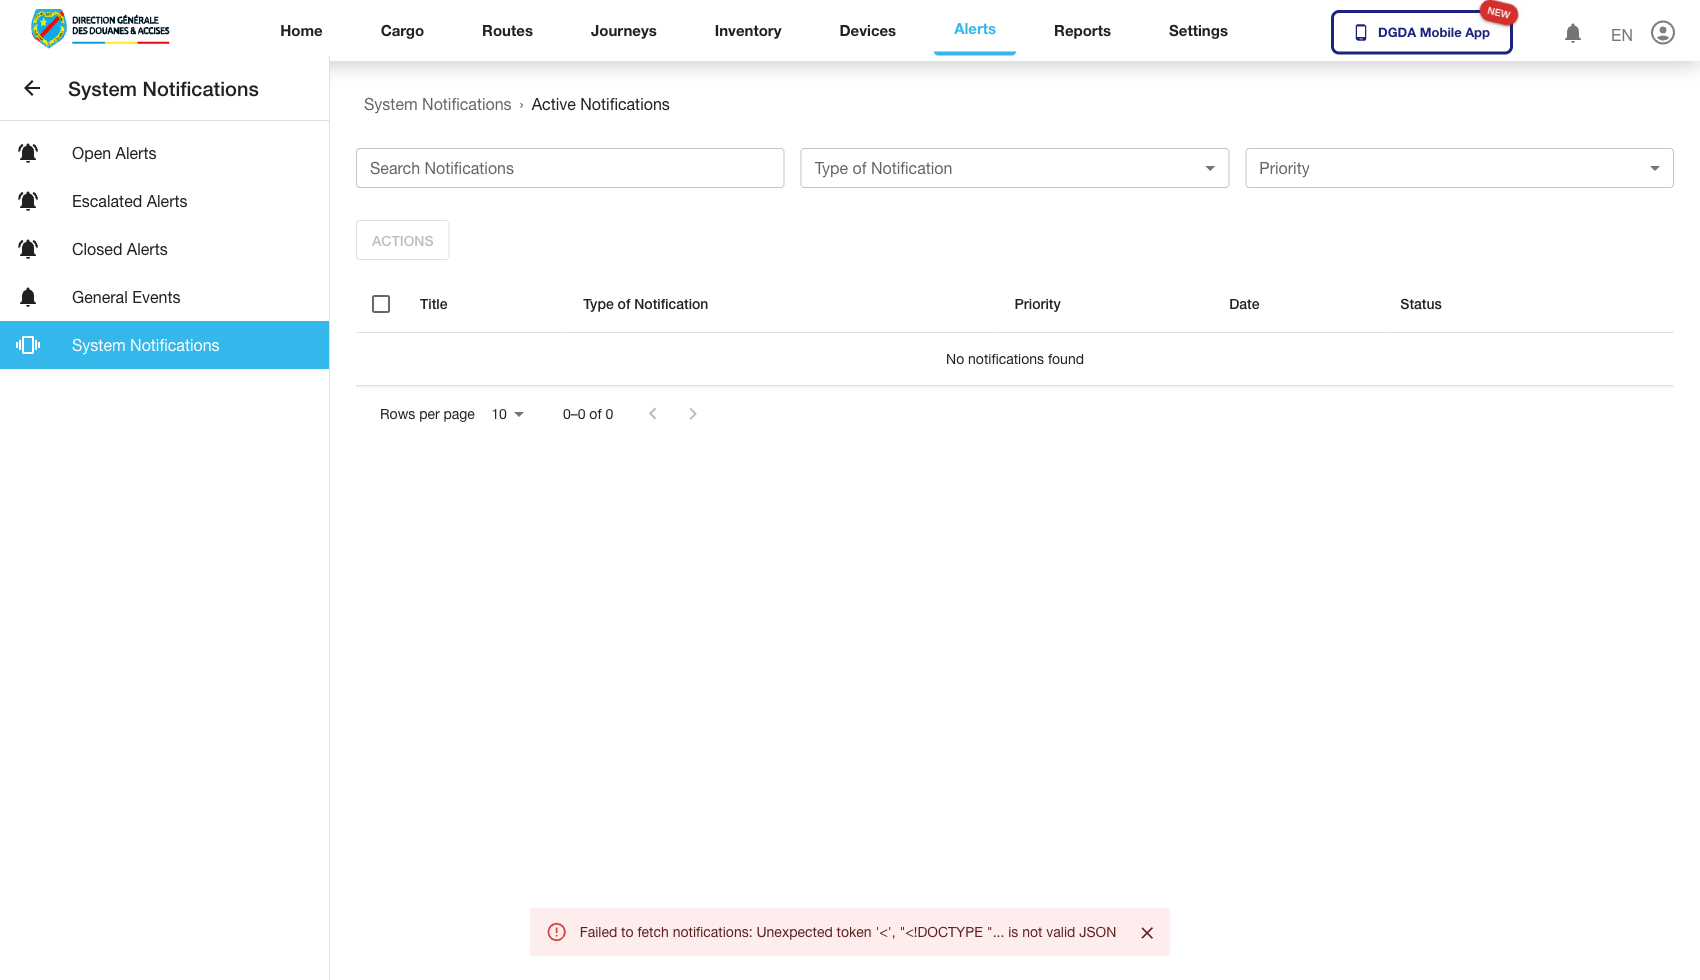
8. Review System Notifications
Purpose: Check broader notification traffic related to platform or operational events.
Route / context: /alerts/system-notifications
Steps:
- Open System Notifications within the Alerts module.
- Review current notification entries.
- Confirm timestamps and messages are loading normally.
- Distinguish between informational notices and items that require response.
Expected result: Users can see system-level notifications independently from the main alert queues.
9. Operational Notes
- Use Open Alerts for day-to-day work intake and row-level investigation.
- The alert detail page exposes the alert status and the same response path from the queue.
- Escalation requires a reason in the validated live flow.
- Closure and escalation both use confirmation dialogs before the workflow is committed.
- Alert settings remain outside the current validated live-capture set.